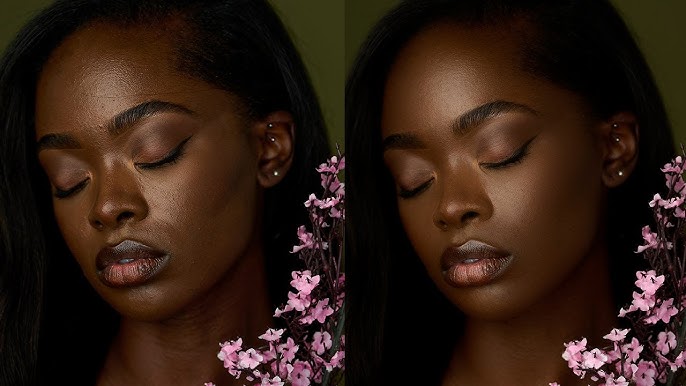
Portrait Retouching
Portrait retouching has become an essential skill for social media users, professionals, and influencers alike. Whether you want to create an eye-catching profile picture for Instagram or a polished, professional look for LinkedIn, proper retouching techniques can help enhance your image while maintaining a natural appearance. For those who prefer expert-level edits, professional portrait retouching services can ensure a flawless yet authentic result.
In this guide, we'll explore how to retouch portraits for both Instagram and LinkedIn, the key differences in editing styles, and tips to ensure your images look both polished and authentic.

Understanding the Purpose of Your Portraits
Before diving into editing techniques, it's important to understand the purpose of your portrait:
- Instagram: A more stylized and engaging platform where vibrant, eye-catching edits are encouraged.
- LinkedIn: A professional space where authenticity, clarity, and professionalism are valued over heavy editing.
Key Differences in Retouching for Instagram vs. LinkedIn
- Skin Retouching: Soft, smooth with glow effects
- Color Grading: Vibrant, creative, trendy
- Background: Blurred, colorful, or artistic
- Filters: Often used for aesthetics
- Sharpness: High for detailed features
- Skin Retouching: Subtle, realistic, and professional
- Color Grading: Neutral, natural, and balanced
- Background: Simple, clean, and distraction-free
- Filters: Minimal or none for professionalism
- Sharpness: Moderate for a natural look
Essential Retouching Steps for Instagram Portraits
1. Enhancing Skin Smoothness
Instagram portraits often require flawless-looking skin without appearing artificial. Follow these tips:
- Use frequency separation to remove blemishes while maintaining texture.
- Apply a subtle dodge and burn technique to even out skin tones.
- Reduce harsh shadows under the eyes using a gentle brush tool.
2. Playing with Colors and Filters
- Use color grading techniques to create warm, cool, or moody tones.
- Experiment with vibrant colors to make your image stand out.
- Avoid over-saturating skin tones; keep it balanced.
3. Defining Facial Features
- Sharpen the eyes and lips slightly to draw attention.
- Enhance the natural glow of the skin using soft light adjustments.
- Increase contrast to add depth to the image.
4. Adding Artistic Effects
- Use bokeh effects or slight blurs to create a dreamy background.
- Apply selective filters to give a signature style to your images.
- Experiment with soft vignette effects to direct focus to your face.
Essential Retouching Steps for LinkedIn Portraits
1. Keep the Skin Natural and Professional
Unlike Instagram, LinkedIn portraits should look polished but not overly edited.
- Remove minor blemishes and stray hairs without over-smoothing.
- Maintain natural skin texture using subtle adjustments.
- Avoid heavy retouching that makes the face appear unrealistic.
2. Maintain Neutral and Professional Colors
- Ensure white balance is correct; skin tones should appear natural.
- Use subtle contrast adjustments to enhance the image.
- Keep the background neutral and clean to avoid distractions.
3. Adjust Lighting and Exposure
- Brighten the face slightly to improve clarity and approachability.
- Use soft shadows to create a natural, professional look.
- Ensure even lighting across the face to avoid harsh highlights or dark areas.
4. Keep the Background Distraction-Free
- Use solid, neutral backgrounds such as gray, white, or light blue.
- If necessary, blur the background subtly to keep focus on the subject.
- Remove distracting objects or clutter using the clone tool.
Best Tools for Retouching Portraits for Social Media
1. Adobe Photoshop
- Best for detailed retouching and professional editing.
- Allows advanced techniques like frequency separation and dodge & burn.
- Great for background editing and object removal.
2. Adobe Lightroom
- Ideal for quick and natural edits.
- Provides powerful color grading tools.
- Best for batch processing multiple images.
3. FaceTune & Snapseed (For Mobile Editing)
- Quick edits for social media posts.
- Good for skin smoothing and light color correction.
- Best for those who need fast, on-the-go retouching.
Common Retouching Mistakes to Avoid
1. Over-Smoothing the Skin
Using too much blur makes the skin look unnatural and plastic-like. Instead, use subtle texture-preserving techniques.
2. Over-Sharpening the Face
Too much sharpening can create unnatural halos around facial features. Keep it moderate and apply sharpening only to key areas like the eyes.
3. Overdoing Filters
Filters can change the mood of the image but can also look unprofessional on LinkedIn. Use them wisely and sparingly.
4. Ignoring Background Distractions
A cluttered background can take focus away from the subject. Always ensure the background is clean and simple.
Final Tips for the Best Social Media Portraits
- Always edit with the platform in mind – what works for Instagram may not work for LinkedIn.
- Check the final image on multiple devices to ensure proper brightness and color balance.
- Keep an original copy of your portrait before editing so you can compare and make necessary adjustments.
- For those who want professional-quality results without spending hours editing, consider using professional portrait retouching services.
By following these guidelines, you can create stunning portraits that are perfectly suited for Instagram, LinkedIn, and other social media platforms. Whether you aim for a creative and eye-catching look or a professional and polished one, mastering the right retouching techniques will ensure your portraits always make the right impression!